

The world we live in is undeniably very different to the world we lived in a month or two ago. Prior to Covid-19 I was out every weekend discovering a new found love for portrait photography. I had just begun transitioning from shooting models to capturing the special bonds between families and couples alike and I was feeling like I had finally found my calling. But now as we are all fighting together by staying home, adjustments must be made.
In this blog post I’ll be sharing my tips on how to take better photos from your phone. I truly believe that a good edit can sometimes take an ordinary photo and turn it into something magical. This is why I’ve decided to offer a temporary service giving clients the opportunity to take photos themselves following the tips below to then send to me for editing. This service is an inexpensive way of making sure that you are not missing out on capturing important moments such as your newborns first days, your growing baby bump or perhaps an engagement announcement. Prices start at just $60 for 10 images and $5 for every additional image.
Sales pitch aside, here are my tips to help you take better photos from your phone.
1. Settings
Fortunately, one of the perks of shooting from your phone is just how few settings there are to get your head around. Sure, some phones have more options than others, but whenever you are unsure of what works best, just use the standard camera. Here are some basic settings to get the best quality from your photo:
» Turn off any filters and beauty effects. You are already beautiful
» Avoid shooting panorama style. Unless you have a very steady hand or tripod, these often turn out wonky
» Only use portrait mode if shooting a single subject. It is exponentially more difficult to get a group of people in focus with all their eyes open in portrait mode
» When taking a photo, press on the screen at your subjects eyes to ensure that they are in focus
» Whatever you do, don’t zoom. If you want a tighter frame, I recommend moving yourself in order to create a steadier and crisper shot
2. Lighting
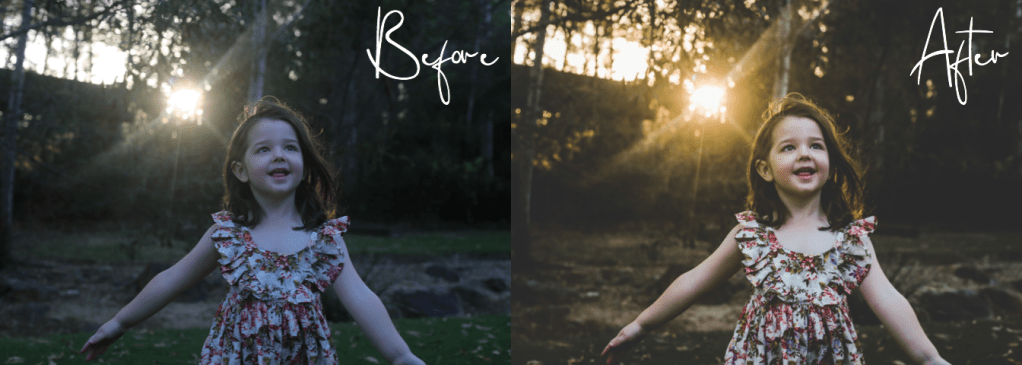
Lighting is one of the most important factors when it comes to capturing a beautiful photo. But this doesn’t mean that you need fancy studio lighting. Personally, I prefer to use natural light from the sun, especially when it comes to shooting portraits. If it’s a cloudy day, the lighting is generally more forgiving. However, if the sun is shining in all it’s glory, I’d recommend shooting either early morning in the hour or so after sunrise or late evening in the hour or so before sunset.
Some additional tips for simple but beautiful lighting include:
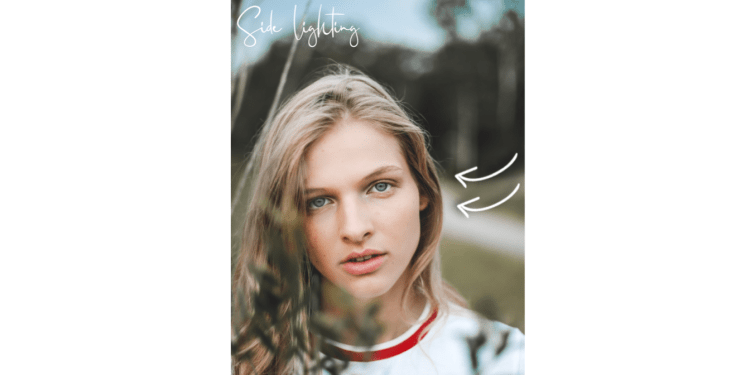
» Shoot with the light source coming in from the side as opposed to in front of or behind your subjects. If shooting indoors, make sure there is a window either directly to your left or to your right
» If this is casting harsh shadows, use a white foam board to reflect the light back on to the subject from the opposite side of the light source
» If shooting during harsh sunlight, find a shady spot
» If shooting indoors and the light is still too harsh, consider using a sheer curtain over the window to soften the light
3. Composition
Framing your image is quite an involved skill with there being several different factors to keep an eye on. To keep it simple, here’s what I recommend focusing on:
» Check your backgrounds. Keep them as simple as possible to avoid any random rubbish, passers by or distractions
» Watch out for stray fingers and cut off arms. It’s almost second nature when taking a photo to put our hands behind the other person’s waist but by doing this it can cut off limbs and have fingers appearing from places they shouldn’t be. Try to always at a minimum have one arm within the shot and place the other hand on the other persons back, out of frame
» Use the rule of thirds. To do this, go into your phone’s camera settings and enable the grid. When capturing your subject, try to position their eyes or the focus point of the subject within one of the grid’s overlapping crosshairs. If this is too tricky, shoot wide and I will fix this in editing
» Watch your limbs. It can be really easy to accidentally cut off a foot or the top of someone’s forehead, but it’s important to try and avoid cutting off body parts, unless you are shooting from chest up
» Shoot at eye-level with your subject as much as possible
» Use the grid to ensure your horizon is straight

4. Outfits
What you wear has a big impact on how the final product will look. When selecting your outfit here are a few things to consider:
» Avoid wearing bright colours, large branding, stripes, spots, and other distracting patterns
» Avoid hats and other head wear that may cast a shadow across your face
» If shooting multiple people, use complimentary colours. It doesn’t have to be matchy-matchy but if you can stick to a colour palette, this creates a more cohesive look
» On that note, select Mum’s outfit first. Flowy dresses, denim, linens and cottons are my personal favourite styling choices. For maternity shoots, wear something that shows off your beautiful bump

5. Posing
Posing is always the thing that clients struggle with. My suggestion is to avoid it. Capturing the candid moments and the little details makes a much nicer photo (in my opinion) than sitting up straight with your hands on your knees. I’ve listed a few posing and shot recommendations based on the subject you are shooting below.
Newborn:
» Capture the little details. Their tiny toes, tiny fingers and little faces. Don’t be afraid to get up close
» If posing with your new born, hold them close to your chest while supporting their head
» Shots of their hands in yours are a great way of capturing the relationship between a parent and their newborn
Maternity:
» Cradle your hands around your stomach and shoot on a side profile. This shows off your beautiful, round bump
» If you have other small children, get them to reach up and put their hands on your tummy to create a special moment between you and your babies
Couples:
» For a romantic photo, try slow dancing
» Avoid holding your partner around the stomach from behind as this always makes them look pregnant (unless they are; in which case embrace it)
» Hold hands, kiss, whisper in each others ears. Little bits of affection create a super sweet photo
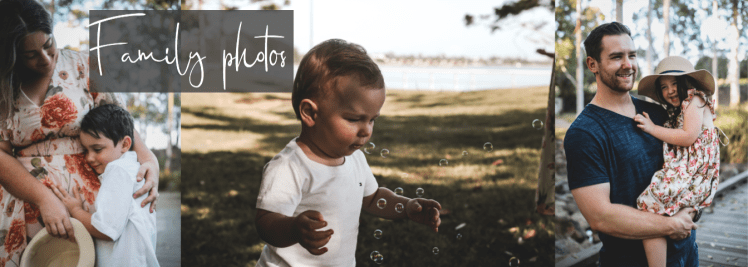
Families:
» Playtime images of the children running around, playing with their toys and blowing bubbles
» Children cuddling their mum, dad or siblings
» Lifting babies in the air (this also helps if you’re wanting to get a smile)
By now you might be feeling overwhelmed. There’s a lot of information in here but if you are able to absorb as much of it as possible, this will help significantly in creating beautiful images. If you miss anything, don’t worry. My favourite thing about photography, is that sometimes the best images happen when you break the rules. If you are unsure of anything, I’m here to help. Feel free to contact me if you have any questions or if you would like to book a shoot post isolation.
